
Easy homemade kimchi.
I make kimchi in every winter. Yes, I am! As a foodie who loves fermentations and pickled vegetables, kimchi is one of my top selections along with common Szechuan style pickled vegetables. This possible not authentic Korean kimchi, but the final taste is good enough for me.If you prefer an authentic Korean style kimchi, check this post on beyond kimchi.

How to choose a cabbage for kimchi—Usually a fresh and denser napa cabbage is great for kimchi. I usually use one around 1000g.
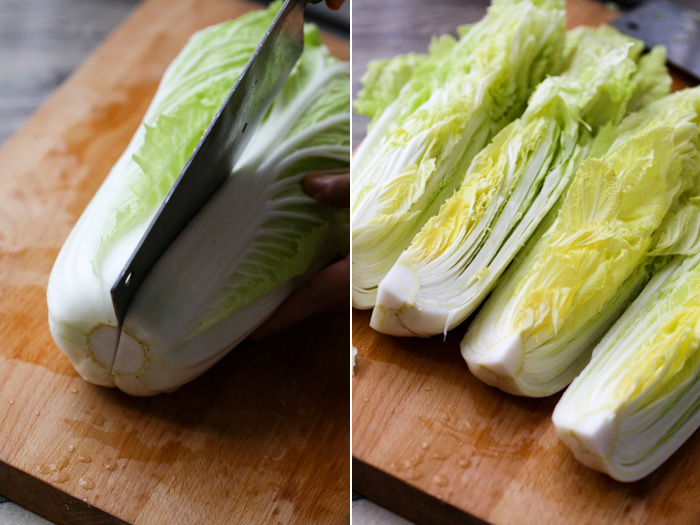
Roughly clean the cabbage and remove any bad leaves. Cut it into two or four pieces. I cut into four pieces.
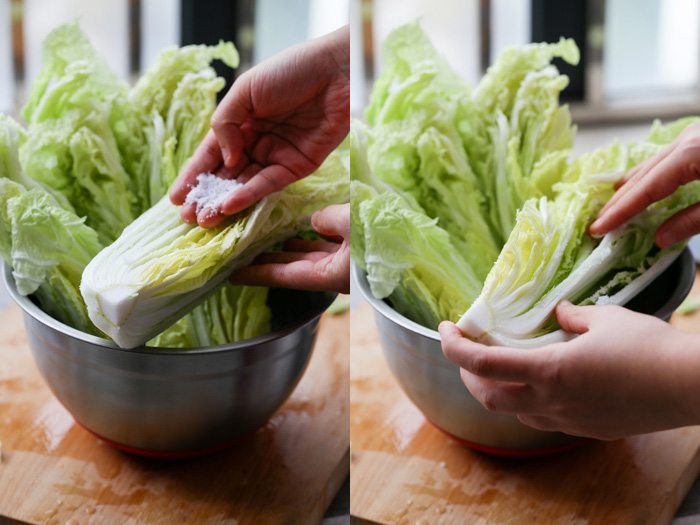
Spread kosher salt evenly on the leaves. Do a little message and make sure all parts are well coated with salt. Set aside for around 6-8 hours or overnight until the leaves starting to soften and wilt.
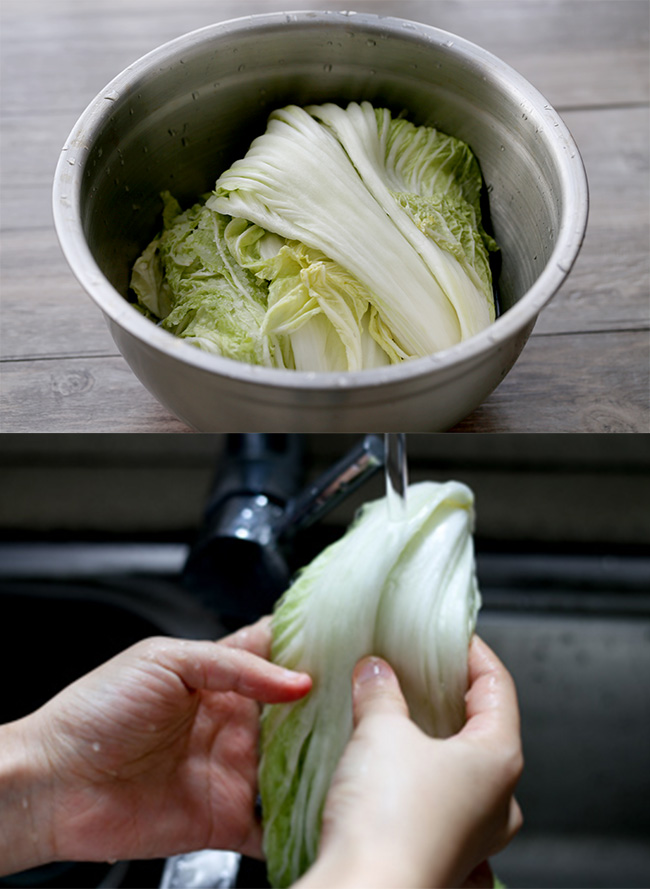
Wash the cabbage under running water to remove extra salt and avoid over salty kimchi. Squeeze the water out and set aside.
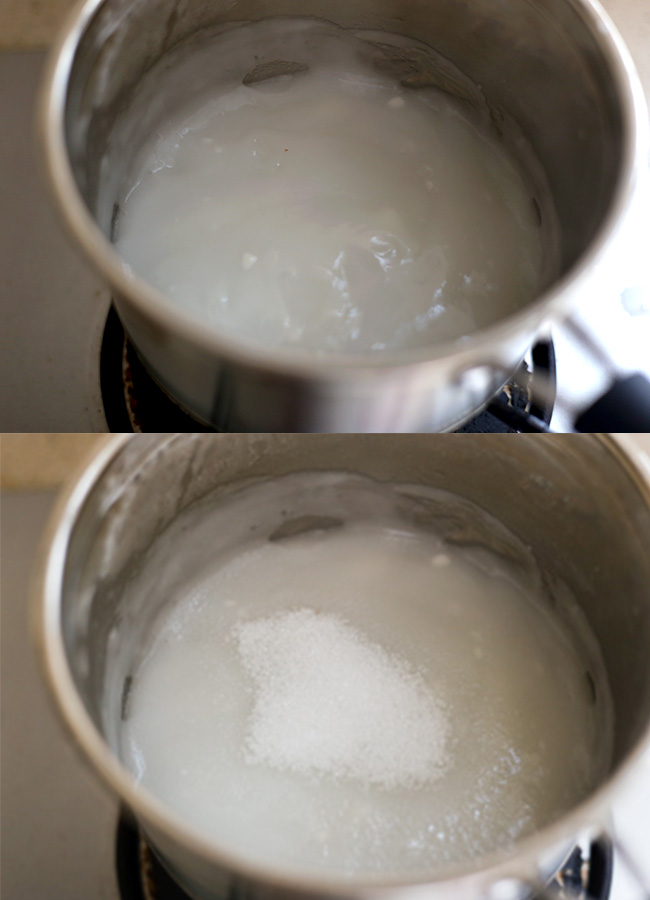
In a small pot, add around 1 cup water with 3 tablespoons of glutinous rice powder. Heat over medium slow fire and continue stirring during the process until the mixture becomes transparent. Add sugar when it is still hot. Stir to dissolve. Set aside to cool down.
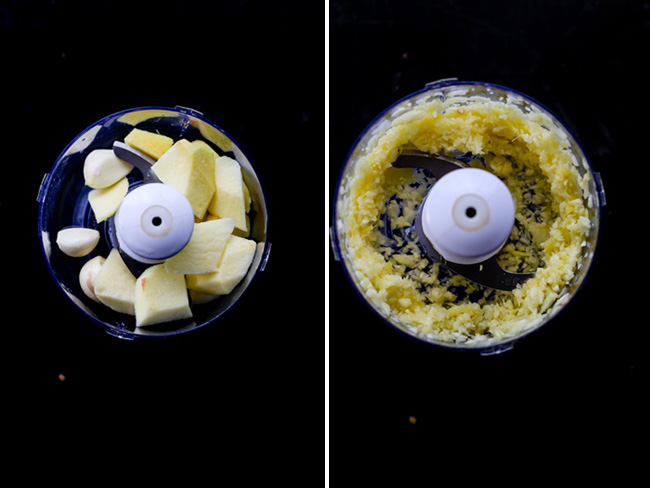
Place garlic, ginger, apple chunk and pear chunk in a food processor, break them into puree or small dices.
Transfer to the rice glue. Add around 4 tablespoons of Korean chili powder, 1 tablespoon salted shrimp, 1 tablespoons of fish sauce and the chive pieces. Give a big stir to combine everything well.

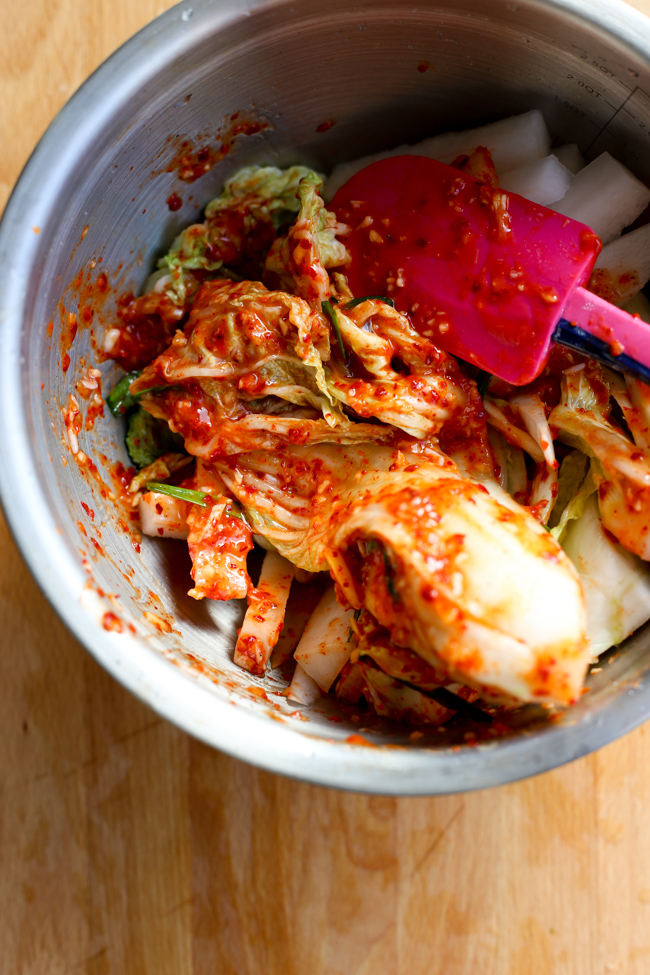
Evenly spread the fermentation sauce on the cabbage and radish strips. Evenly, evenly, evenly!!! If you need to use hand, wear a plastic glove.
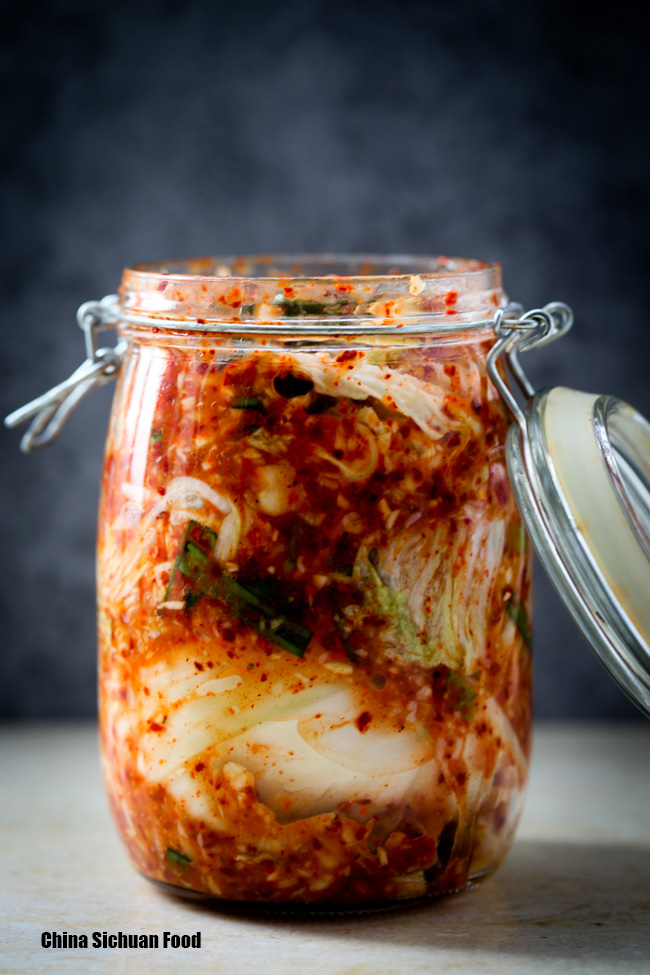
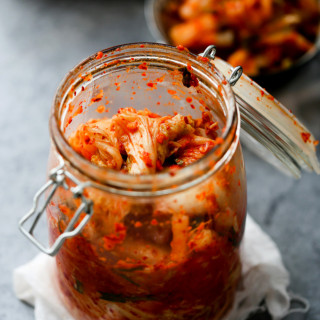
Transfer them to a pre-cleaned airtight jar. Rest at room temperature for 24-48 hours until it is slightly sour with the lid unsealed completely. And then seal the jar completely and keep in refrigerator. Serve directly as a side dish after 7 days fermentation or use in other recipes like soups, pancakes after 2 weeks.
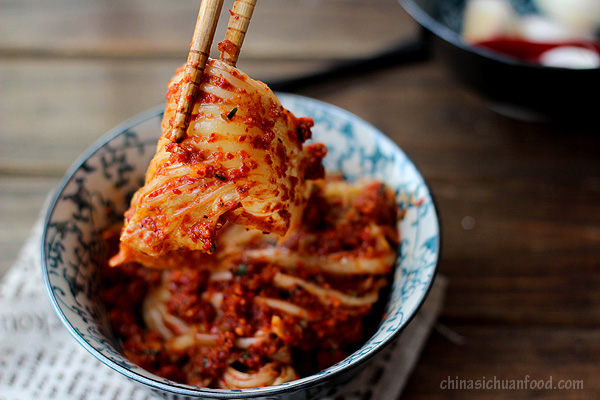
After 7 days fermentation: slightly sour and crispy in texture
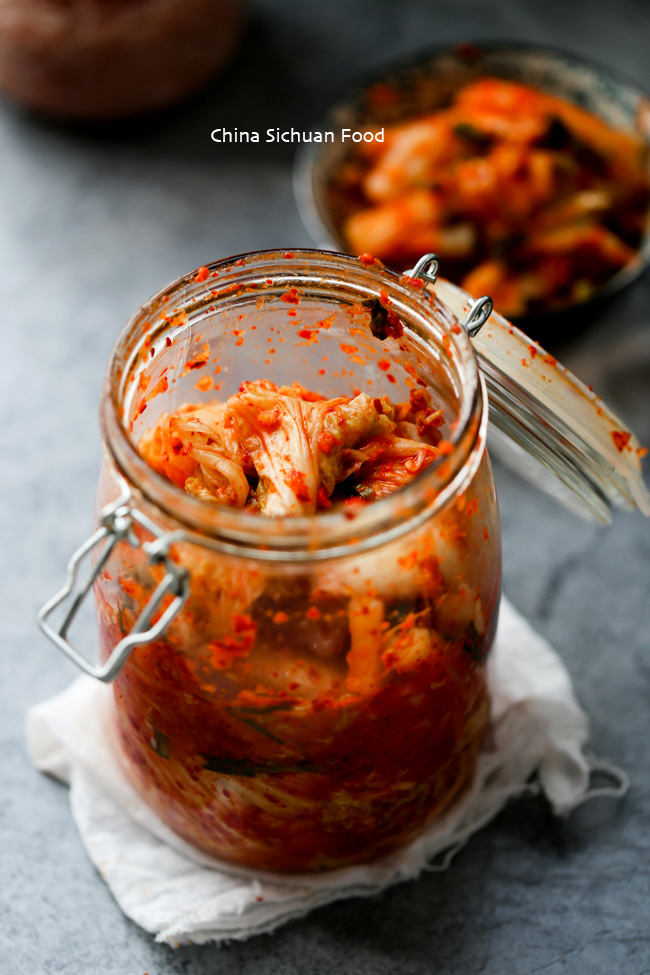
After 2 weeks fermentation: sour and soft in texture.
At this time, the sauce is perfect for kimchi fried rice.

Homemade Kimchi
Ingredients
- 1 fresh Napa cabbage , around 1000g
- 1/3 cup kosher salt
- 4 tablespoons Korean chili powder
- 1 small bunch of Asian chive , or green onion , hard root removed
- 1/4 middle size radish , cut into small strips
- 4 garlic cloves , peeled
- 1 thumb ginger , peeled
- 1/4 middle size apple , peeled
- 1/4 middle size pear , peeled
- 1 tablespoon fish sauce
- 1 tablespoon Korean salted shrimp
Rice glue
- 3 tablespoons glutinous rice powder
- 1 cup water
- 1-1.5 tablespoons sugar
Instructions
- Roughly clean the cabbage and remove any bad leaves. Cut it into two or four pieces. I cut into four pieces. Spread kosher salt evenly on the leaves. Do a little message and make sure all parts are well coated with salt. Set aside for around 6-8 hours or overnight until the leaves starting to soften and wilt.
- Wash the cabbage under running water to remove extra salt and avoid over salty kimchi. Squeeze the water out and set aside.
Prepare the fermentation sauce
- In a small pot, add around 1 cup water with 3 tablespoons of glutinous rice powder. Heat over medium slow fire and continue stirring during the process until the mixture becomes transparent. Add sugar when it is still hot. Stir to dissolve. Set aside to cool down.
- Place garlic, ginger, apple chunk and pear chunk in a food processor, break them into puree or small dices. Transfer to the rice glue.
- Add around 4 tablespoons of Korean chili powder, 1 tablespoon salted shrimp, 1 tablespoons of fish sauce and the chive pieces. Give a big stir to combine everything well.
- Evenly spread the fermentation sauce on the cabbage and radish strips. Evenly, evenly, evenly!!! If you need to use hand, wear a plastic glove.
- Transfer them to a pre-cleaned airtight jar. Rest at room temperature for 24-48 hours until it is slightly sour with the lid unsealed completely. And then seal the jar completely and keep in refrigerator. Serve directly as a side dish after 7 days fermentation or use in other recipes like soups, pancakes after 2 weeks.
Looks like a really nice kimchi recipe. In step 10 “place the container in freezer” should be “place the container in refrigerator.”
Thanks David for the correctness.
Do you really mean 250 g (1 cup) of chili powder???
Yes Karen. I use around 250g Korean chili powder which has a bright red color but not spicy. And I am quite sorry that I failed to note I marinate both cabbage and white radish with the sauce made once.I have adjust the amount for just one cabbage.
its really nice to have a recipe for a small portion of kimchi 🙂
i’m gonna try it as soon as possible!
I usually made small batches all through the winter. I love the newly fermented ones. Hope you will like the simple version too.
Why do put stick rice glue to the Kim chee?
Noinaa,
It works like a glue so the sauce can adhere directly to the cabbage.
Hi Noinaa,
sticky rice work as a glue to help the chili sauce adhere to the cabbage.
Hi Elaine,
I love Kim Chi and I’m so excited to try making it myself.
I’m just wondering how long it can be kept in the refrigerator for, before it starts to spoil.
Thank you,
Jes.
Hi Jes,
Usually I finish all of my kimchi within 2 weeks.
Hi Jes,
It will keep unspoiled quite a long time (4-6 month) if handled carefully. Wash your hands, chopsticks or whatever you handle it with meticulously and it won’t go bad. Just try to remove any excess air or bubbles it shows after the initial two days of fermenting and after each time you handle it. This may however vary depending on the climate you live in and the fridge you are using. (I’m able to keep my fridge well below 10 degree Celsius around the year).
I also use glass canning jars with a rubber sealing to store it in, this will make a difference, too.
I live in Indian sub continent where Korean red pepper is not avialable.what I can use instead of Korean red pepper and seasalt?
Hi Muhammad,
You may replace Korean red pepper with red peppers with bright color and less hot taste. Kimchi should be not too spicy after fermentation. If there is no salt in your area, you can replace it with any type of salt that is available to you. This may not the perfect choice but can give a chance to enjoy the yummy kimchi.
Great site. I came for the noodle recipe and stayed for the kimchi and char sui recipes. If you need someone to check your English translations, I’m happy to help.
Hi Renae,
Sorry for my poor English. I have made a plan to improve my English. I already have several readers helping me check the writing on the site. And I am grateful if you can join them.
Hi Elaine,
May I ask in which step I can add in fish sauce and what it used for?
many thanks
Hi Kate,
Fish sauce should be added in the fermentation sauce, as listed in step 5 mainly for flavoring.
hello, i just wanted to say thanks for this recipe, it worked fine for me 🙂
maybe you can do a recipe for white kimchi as well someday 🙂
greetings!
What is the yield? Do I need quart jars, if so, how many Thanks!
Hi DB,
I use the jar from Ikea. One 1L bottle is enough for this amount. I prefer small batches that can be finished within 3 weeks.